There are many ways to create a Service Fabric cluster and what follows, is by no means, the only one.
A few posts have been written elsewhere on the internet (for example Create Service Fabric clusters from Visual Studio) and whilst they are accurate, I felt they were lacking detail in some areas, so here’s my take on creating a Secure Service Fabric cluster. As I will cover in a related post on my observations whilst working with Service Fabric (coming soon), I am a firm believer in scripting the creation of everything possible and I fully admit that this post does not achieve that. However, if you want an easy way to get started, then the approach described here is probably the best option.
Why create a secure cluster?
I could simply say: “Because it is secure”, but that doesn’t really answer the question.
The management of the Service Fabric cluster is performed via Service Fabric Explorer which supports both Certificate and Azure Active Directory authentication (more information can be found at Service Fabric Security) with the certificate being the simpler, default option.
Now, it is possible to create an insecure cluster (no, it doesn’t have personality issues!) that anyone can access over the internet and make changes to, but even for a test cluster, it is recommended that you always build a secure cluster.
Whilst a secure cluster can be created in a few steps – either via the Portal or using ARM (Azure Resource Manager) templates, this post focuses on the latest option available directly in Visual Studio 2017 15.6 and higher.
Creating the Service Fabric Application
For the following steps, I created a Service Fabric Application called SFApplication1 with a Stateless ASP.Net Core API Service called Web1 with no authentication. Basically, I chose the defaults where applicable as they are also the simplest to test – which we will do at the end of this post. If you prefer to create a different Service-Type, that is, of course, absolutely fine. Whatever service-type you choose, please make sure you can test it works once deployed to ensure the cluster has been created correctly.
Creating the secure cluster
Ensure you are logged in to Visual Studio with an account that can access the target subscription.
There are several ways to publish the Service Fabric Application, below are the two simplest options:
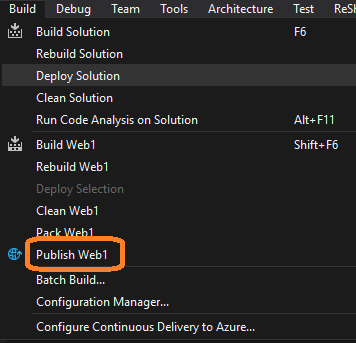
From the Build menu, select Publish Web1:
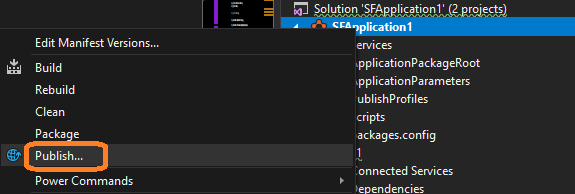
 Or by right-clicking the Service Fabric Application (the one with the pretty icon partially obscured below):
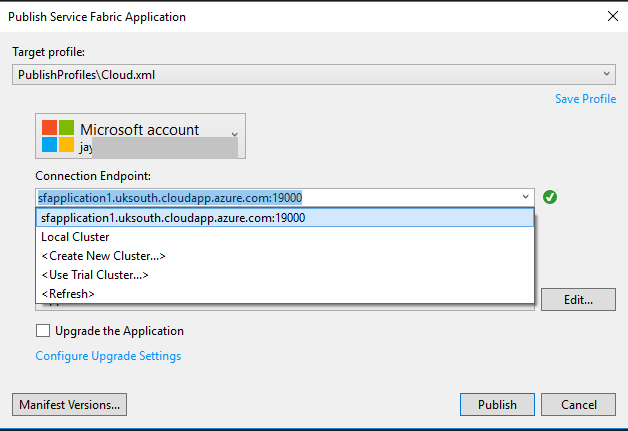
Either method will display the main Publish screen:
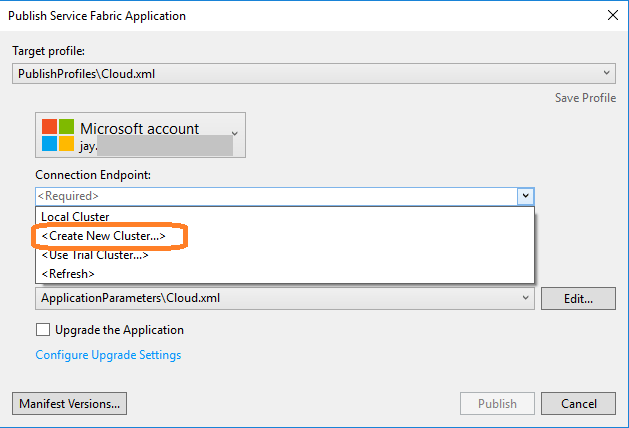
As highlighted above, in the Connection Endpoint, you can select Create New Cluster. Doing so will launch the following screen:
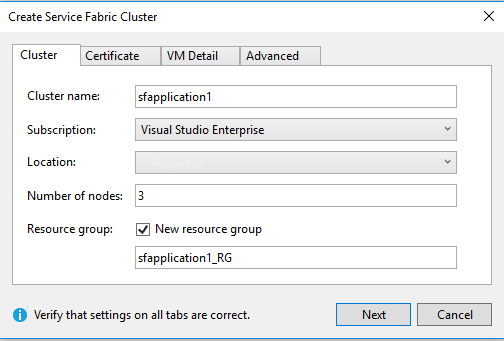
As I am in the UK, I set the Location to UK South but left the other options as the defaults. Specifying a 3-node cluster will automatically denote it as a Test cluster in Azure - i.e. a cluster that is not suitable for Production use and has certain restrictions - for full details, please see the Service Fabric cluster capacity documentation.
You can either click Next to navigate to the Certificate tab or simply click the Certificate tab. Either will present the following screen:
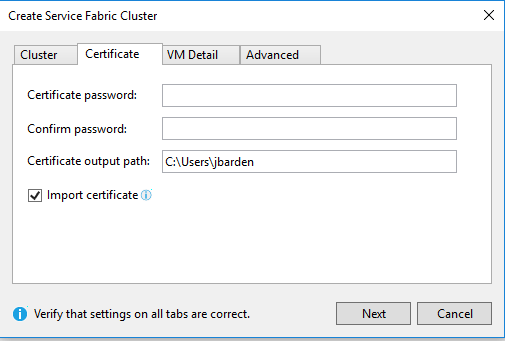
As part of the wizard, a certificate will automatically be created in an equally automatically created Azure KeyVault – no need to do anything 😊 The Import certificate checkbox will import the certificate once created so you can immediately manage the cluster via the Service Fabric Explorer. The certificate password is not optional, I recommend you use a strong password even if the cluster is only intended for testing (as it is here).
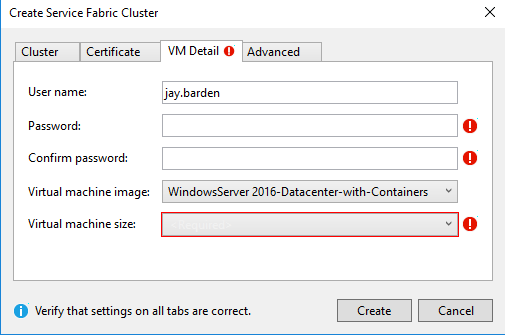
Clicking Next or selecting the VM Detail tab will display the following:
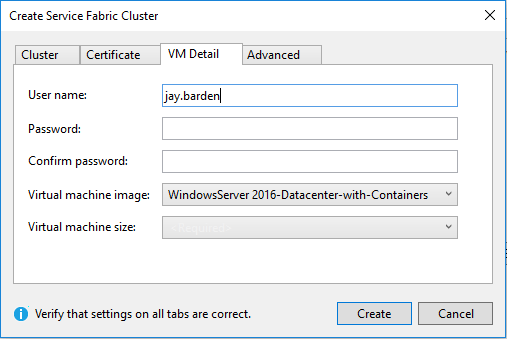
At this point, you may notice that the Next button has changed to Create and is enabled. Don’t be fooled in to thinking you can skip the remaining options:
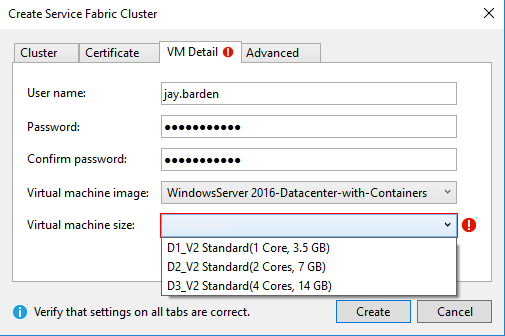
The current template does not list all the possible VM sizes but does cover the basics (and, the size can be changed later via the Portal / PowerShell / Azure CLI):
The Advanced tab has the following options:
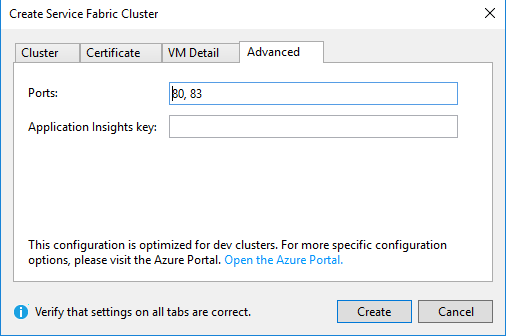
As shown, ports 80 and 83 are enabled by default – I usually remove 83 (as I avoid using non-standard ports for publically accessible APIs - I am not sure why Microsoft even include Port 83!) but you can set the ports to whatever you require. The Application Insights key is more interesting; it not only allows you to specify the key (no surprise there) but it will automatically send the cluster messages (such as Application Starting) to the specified Application Insights instance. You will still need to send your application-specific messages to Application Insights if you want them to show there, but this does simplify monitoring the overall cluster health quite considerably.
I have entered my Application Insights key and clicked Create. After 1-2 seconds (where Visual Studio performs a series of validation checks), a confirmation screen will be displayed:
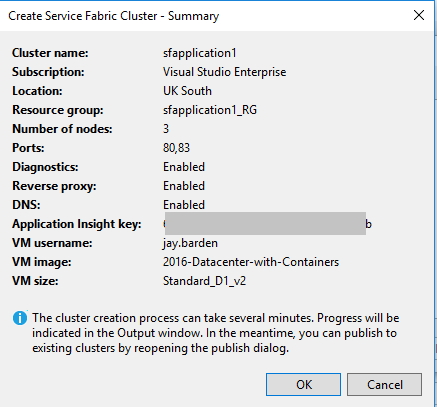
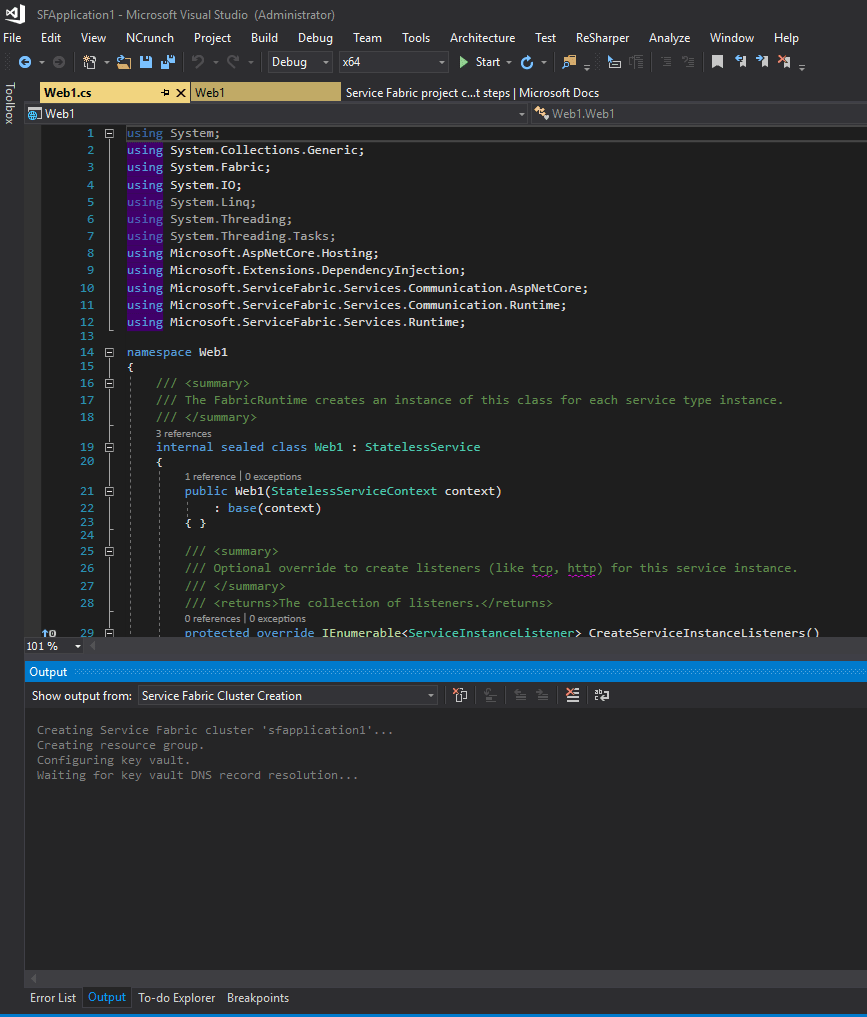
Clicking OK will return you to Visual Studio and how the output window with the status messages:
The mistake I made the first time was thinking that the Application would also be deployed – this is not the case. A second Publish will be required as we will see later. In hindsight, it is clear that we have deviated from the initial Publish route as we are creating a cluster, but that did not occur to me the first time!
The Resource group will be created, and you can monitor the creation of the cluster from either Visual Studio or the Azure Portal (although). I’ve italicized the monitor as the Azure Portal will only show the items created, not any pending items such as the actual VMs:

From the Properties option (1), we can see the Provisioning Status (2) was successful and that the nodes are being created (3).
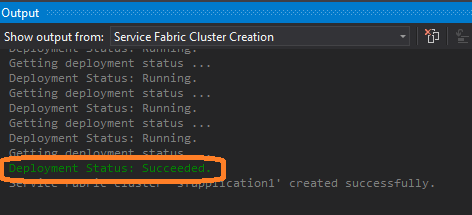
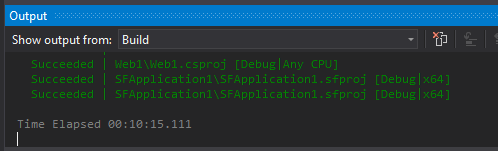
For this test, the cluster took approximately 15 minutes to create which is far from ideal but the screenshot below shows the successful completion message (if you are wondering how / why the completion message is green, may I recommend VSColorOutput which is an excellent Visual Studio plug-in).
The Portal shows:

The Cluster state shows Baseline upgrade and this means we are good to go. OK, it really means the cluster is performing some internal upgrade tasks, but it is fully functional for our purposes so we can continue.
Publishing the Application
As with the Cluster Creation, you can use the same Publish option you used earlier - i.e. either from the Build menu or by right-clicking the Application Project. The original Publish screen will be displayed again:
You may need to <Refresh> to see the newly created cluster.
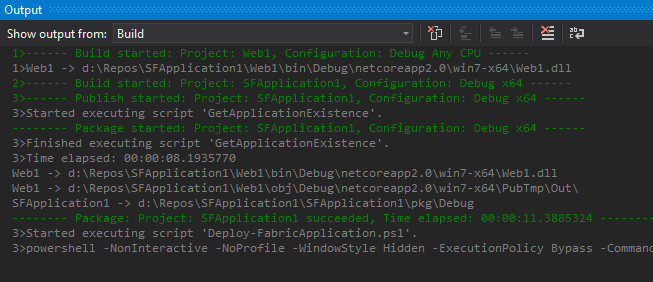
As the application does not exist, we do not need to select the Upgrade the Application or change any of the other defaults. Click Publish and you will be returned to Visual Studio. Below is a capture of the Output window just after clicking Publish.
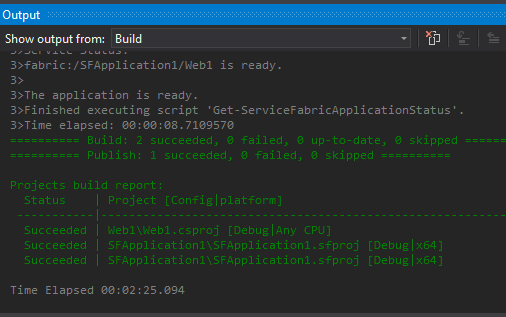
Once completed, the Visual Studio Output window will look like the one below:
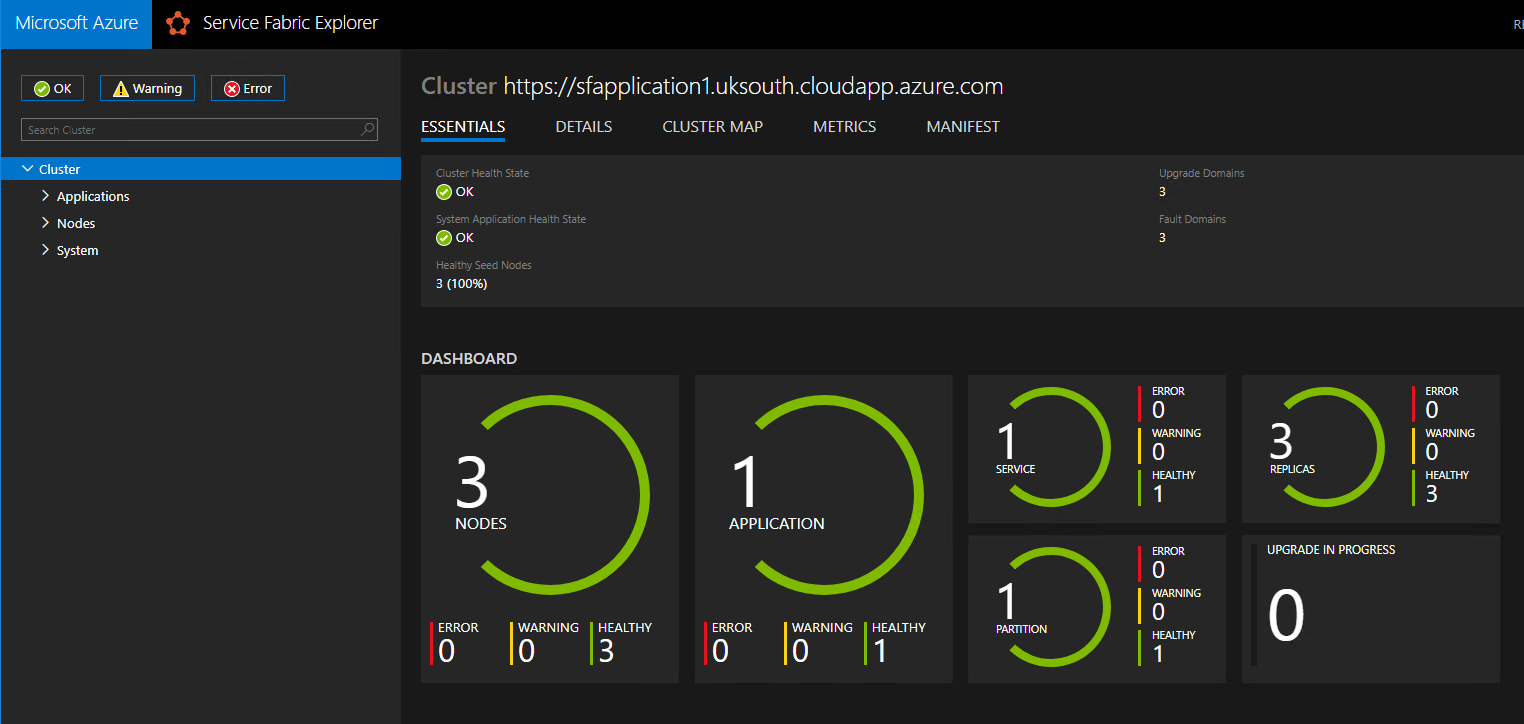
And the Service Fabric Explorer will look like:
Did you notice the issue I deliberately created? No? Neither did I as I was doing the screenshots! I didn’t change the WebAPI to use port 80 or specify the port WebAPI uses in the Cluster Creation (on the Advanced tab).
As it stands, Postman - an excellent tool for testing APIs - shows:
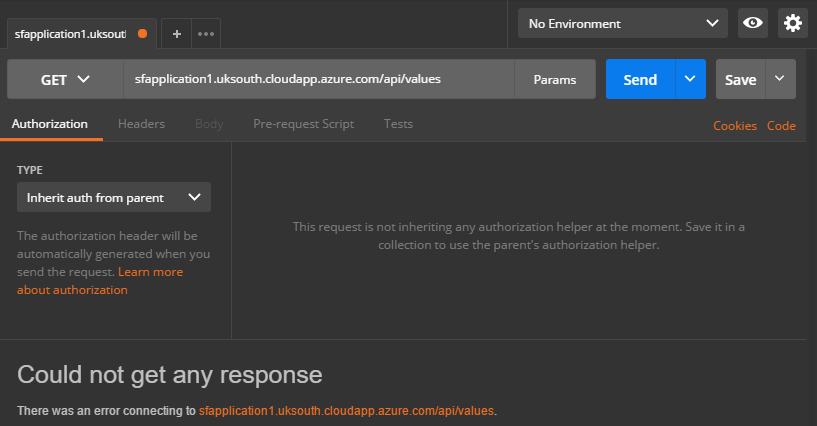
To resolve this, I have two choices:
- Add the port to the cluster configuration or
- Update the Service Manifest (shown below):
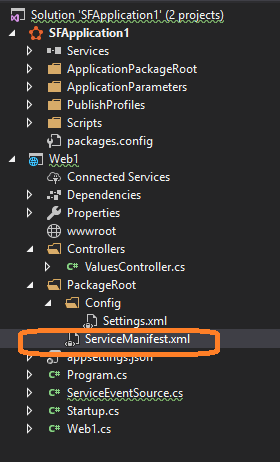
As mentioned in several posts, I am lazy by nature, so I will change the Service Manifest, but this also improves the accessibility as the port will become an industry standard port – a win-win to me!
Below is the default ServiceManifest (the pink squiggles are from the Visual Studio Spell Checker plugin showing that even Microsoft can make mistakes! Directoy…) with the Port highlighted – your port number will probably be different.
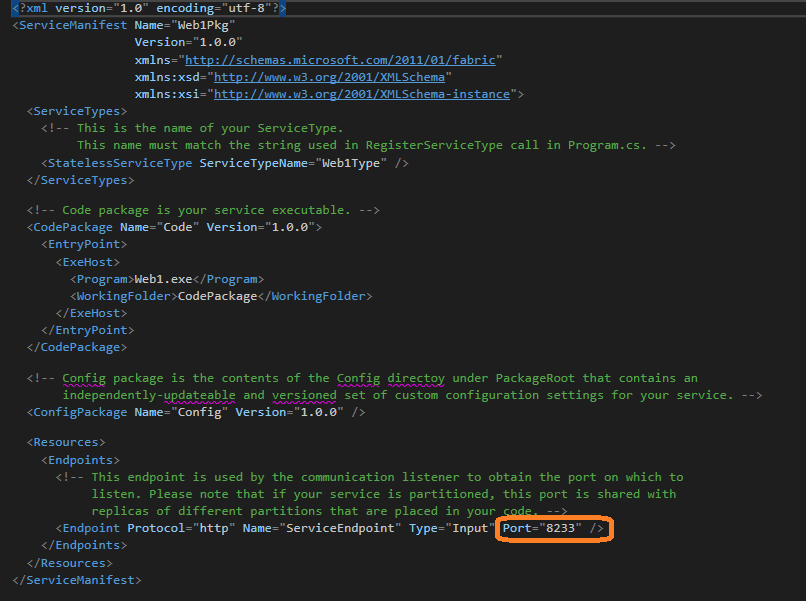
Once changed to 80, I can redeploy:
As the steps are the same, I won’t repeat them all here. The important differences are:
The Upgrade the Application must be ticked (#1 below) as, by default, Visual Studio will deploy the application as though it were a new application and the deployment will fail - even if the manifest has been updated (#2 below):
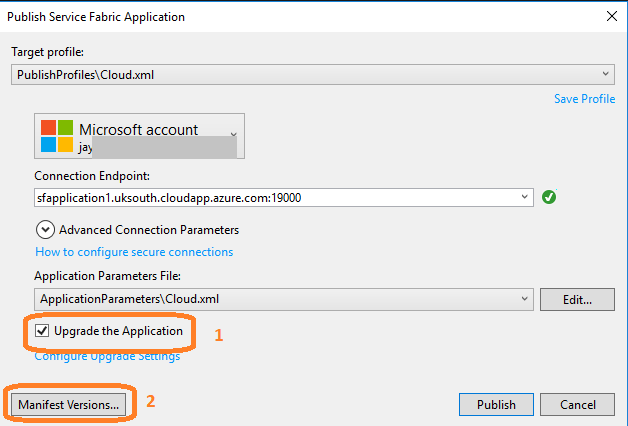
We also need to update the Manifest Versions by clicking the Manifest Versions button (#2 above). This is required so that Service Fabric knows the version is different (the how it is different does not matter as we will see below) or a Same version error will occur.
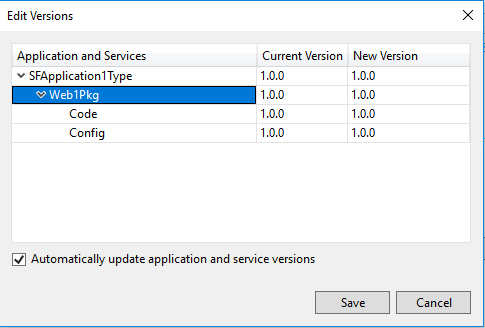
The Edit Versions screen is shown below – I have expanded the Web1Pkg but other than that, it is as is.
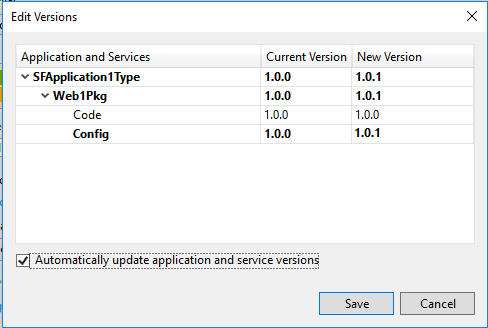
Whilst the above versions are using the traditional Semantic versioning, you don’t have to – all that matters to Service Fabric is that the new version is different from the current version. Below, I have continued with the Semantic versioning and updated the Config version to 1.0.1 – as the Automatically update application and service versions is ticked, and as the example is using sematic versioning, the Application Version is also increased to 1.0.1 automatically (yep, I’m lazy!)
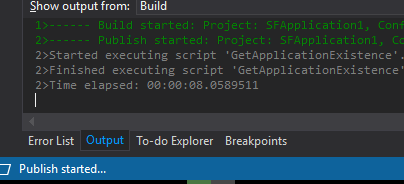
Clicking Save will return you to the previous screen where we can simply Publish, and you will again return to Visual Studio. Below is a snapshot of the Output window:
After a few minutes, the application upgrade will be complete, in the meantime, you can also monitor via Service Fabric Explorer:
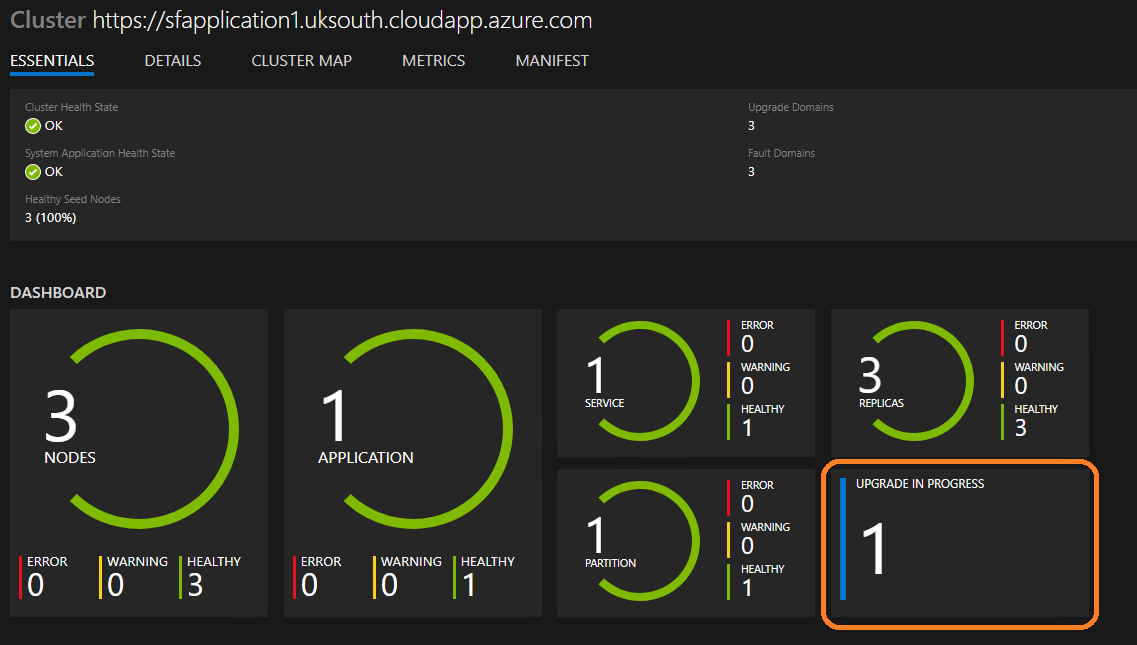
Clicking on the highlighted box above will show the upgrade domain status:

Once complete, Service Fabric Explorer will return to the earlier appearance:
Within Visual Studio, the Output window will show:
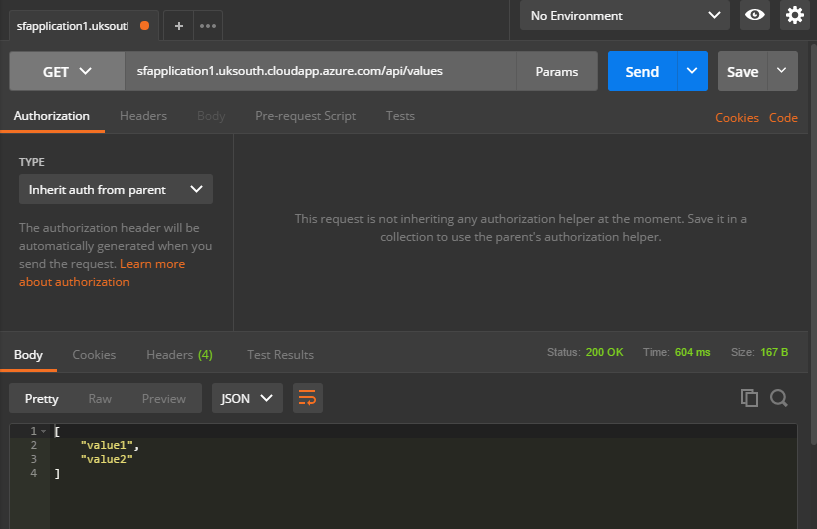
More importantly, Postman will get a result:
Conclusion
Creating a cluster from Visual Studio is a reasonably painless experience which, as a bonus, follows the current Microsoft Best Practices without you having to perform several manual steps.
Thank you to Mark Cunningham for reviewing this post, but most importantly, thank you for taking the time to read this post too - I hope you found it useful.
