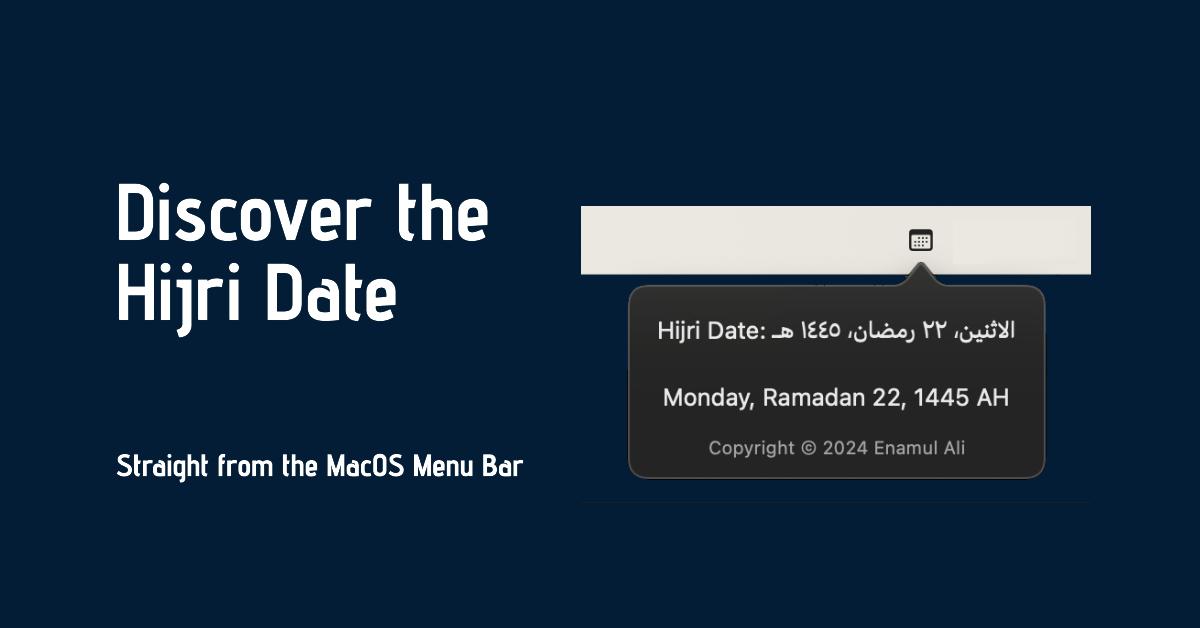
For a first foray into MacOS development, I built a custom menu bar application. The Hijri Menu Bar allows the user to view the current Hijri date. It is convenient, minimal and easy to use. Below, we’ll highlight the development process, looking at the code, build process and challenges faced.
Development
The development process began with setting up the project in Xcode. Swift and SwiftUI were chosen as the foundations for the app. Essential components such as the AppDelegate, which manages the app’s startup and background tasks, were incorporated, alongside a custom StatusItemView to handle the UI and what the user would see.
App Delegate
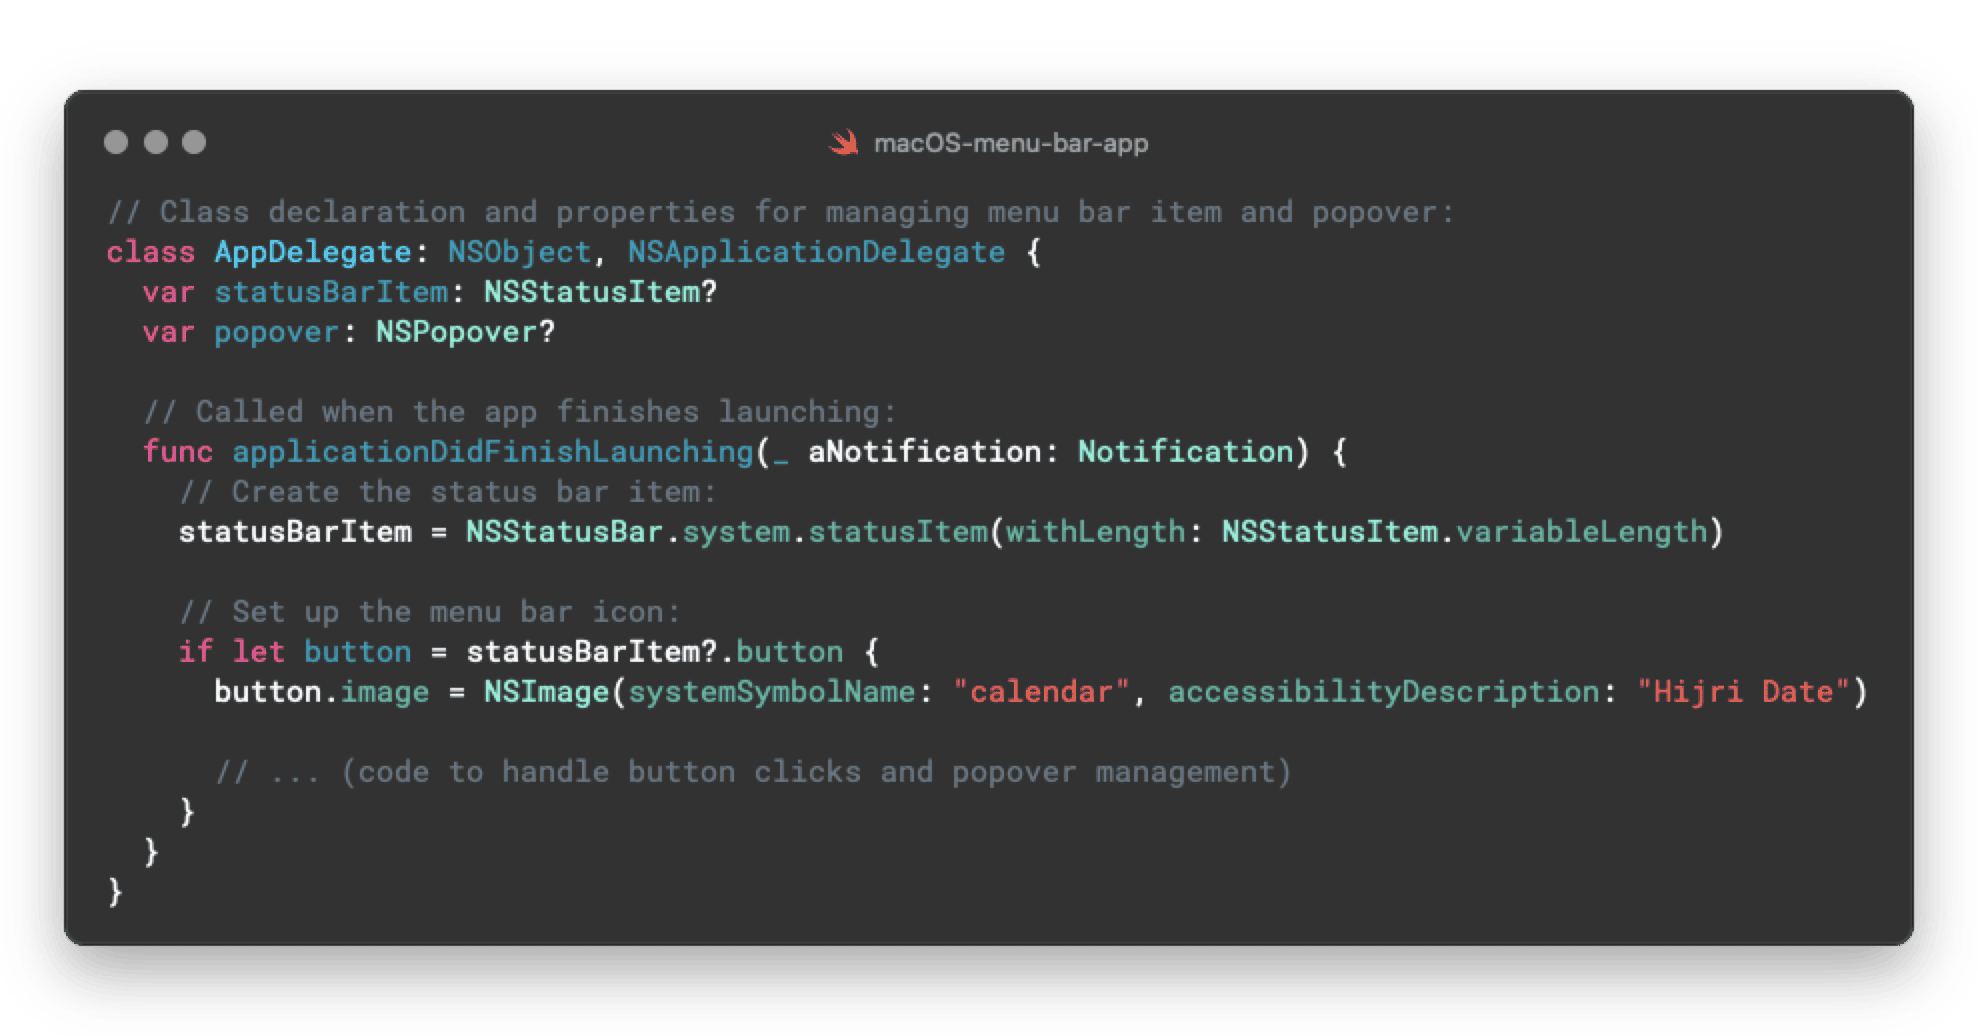
The AppDelegate class is responsible for setting up the status bar item, managing the popover and handling user interactions. It initialises a clickable item in the menu bar with a calendar icon.
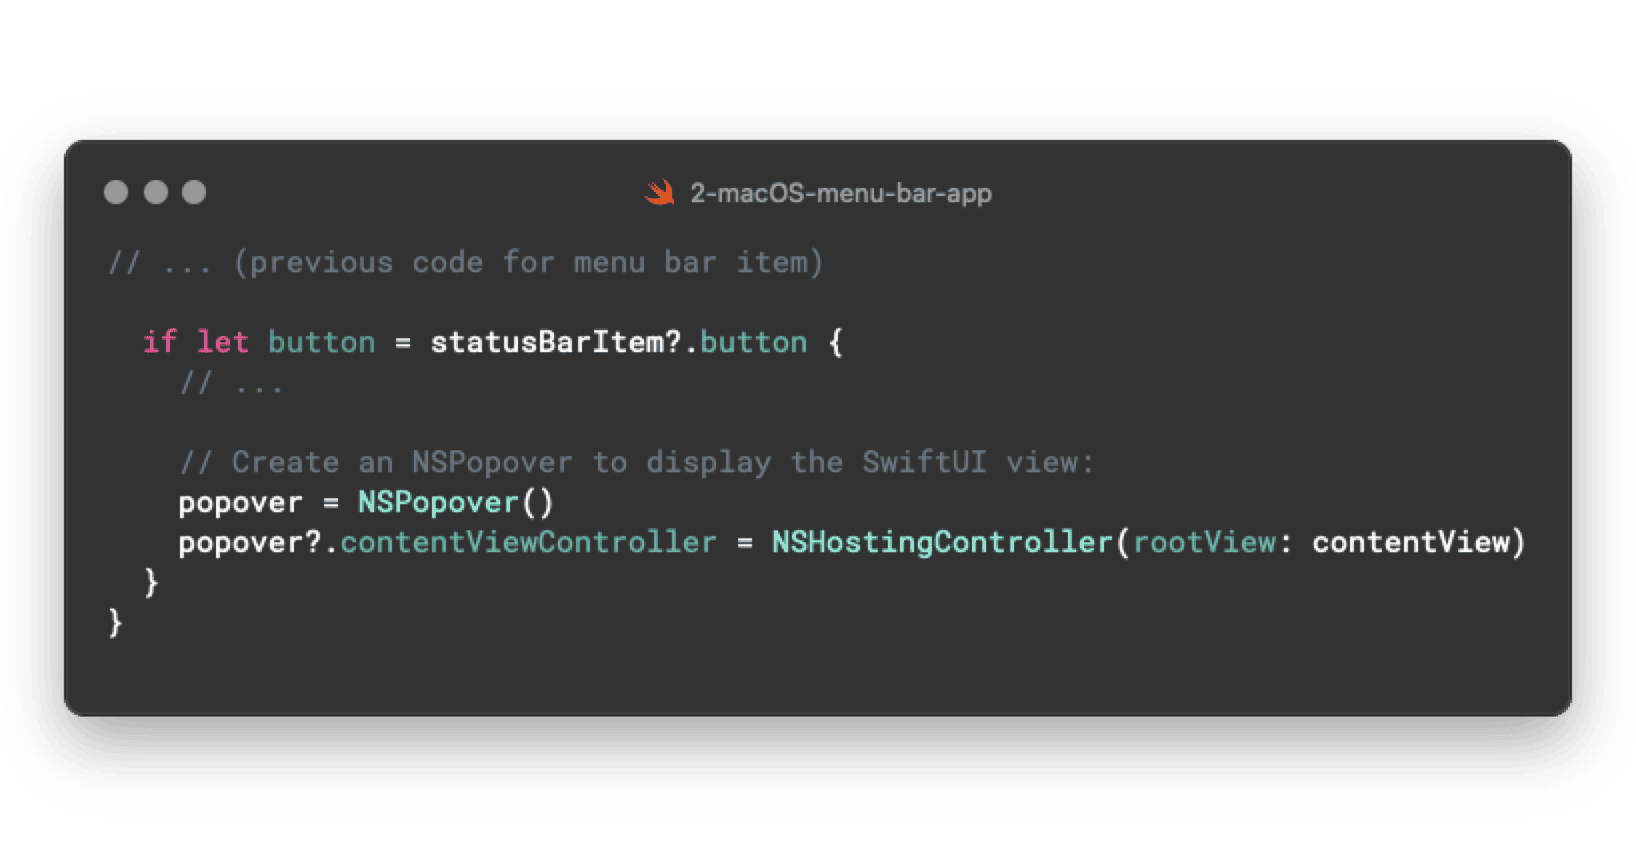
An NSPopover is essentially a holder to display the contentView (a SwiftUI view). This popover will utilise a custom SwiftUI View to display the current Hijri date information.
Now we have a clickable item in the menu bar and a popover. We need to ensure when the item is clicked, the popover will appear on the screen.
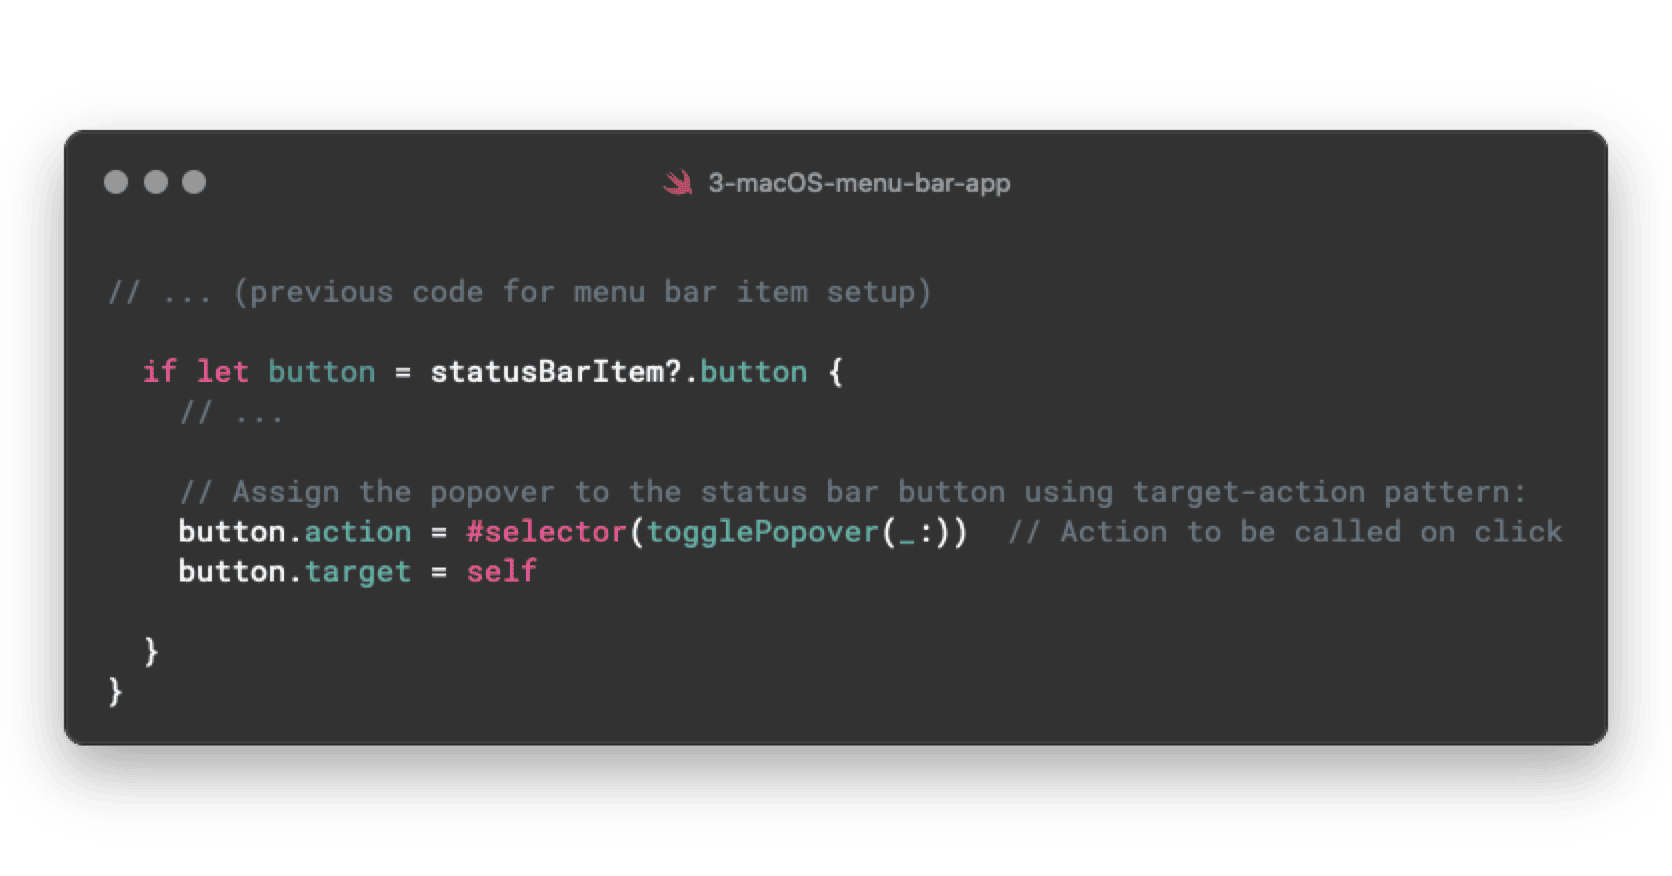
To achieve this, the Button action and target lines establish the target-action pattern. Clicking the button will now trigger the togglePopover(_:) function (defined below).
This function decides whether to show or hide the popover, based upon it’s current state.
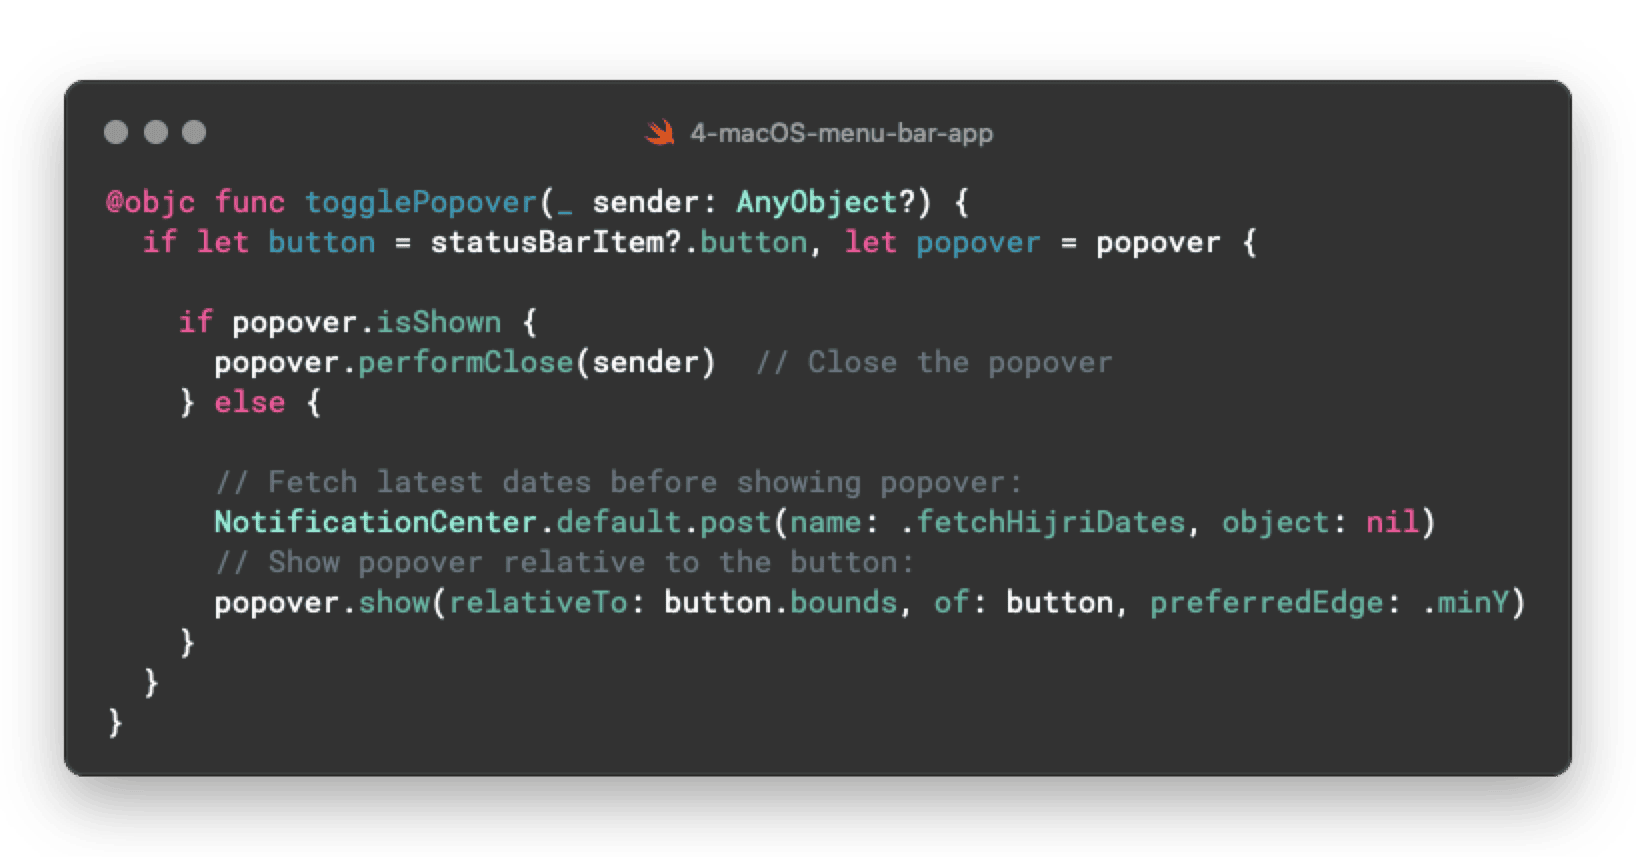
The togglePopover(_:) is a custom function. It first checks for the validity of both the button and popover. If the popover is already shown, it will close it.
If the popover is hidden, it fires a custom notification .fetchHijriDates. This will be received later in our StatusItemView (The SwiftUI view responsible for displaying the dates).
This function also displays the popover relative to the menu bar icon’s bottom edge.
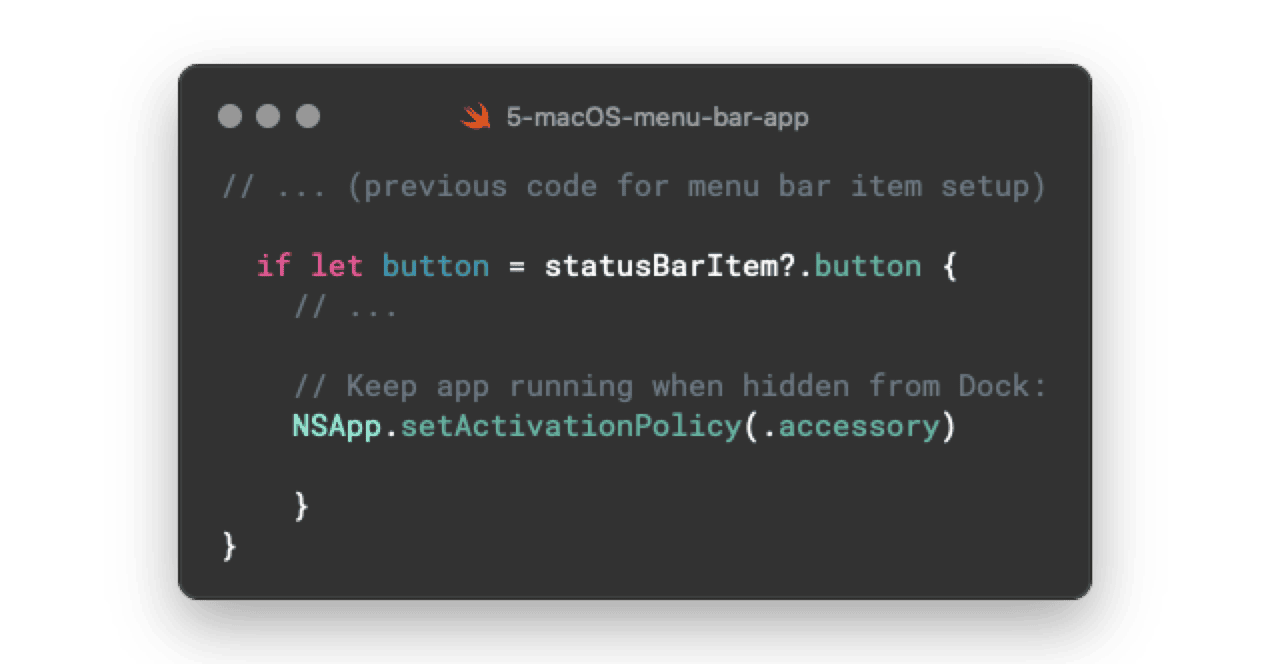
Applications in MacOS can have different activation policies that determine how they behave in the user interface. Setting the activation policy to accessory mode means that the application will remain active in the background, even if the user closes its window or quits the application. This is useful for menu bar applications that need to remain running without requiring constant user interaction.
User Interface
After configuring the AppDelegate, the focus shifted to building the user interface. A new file is created called the StatusItemView. This will be responsible for displaying the current Hijri date in the popover created above.
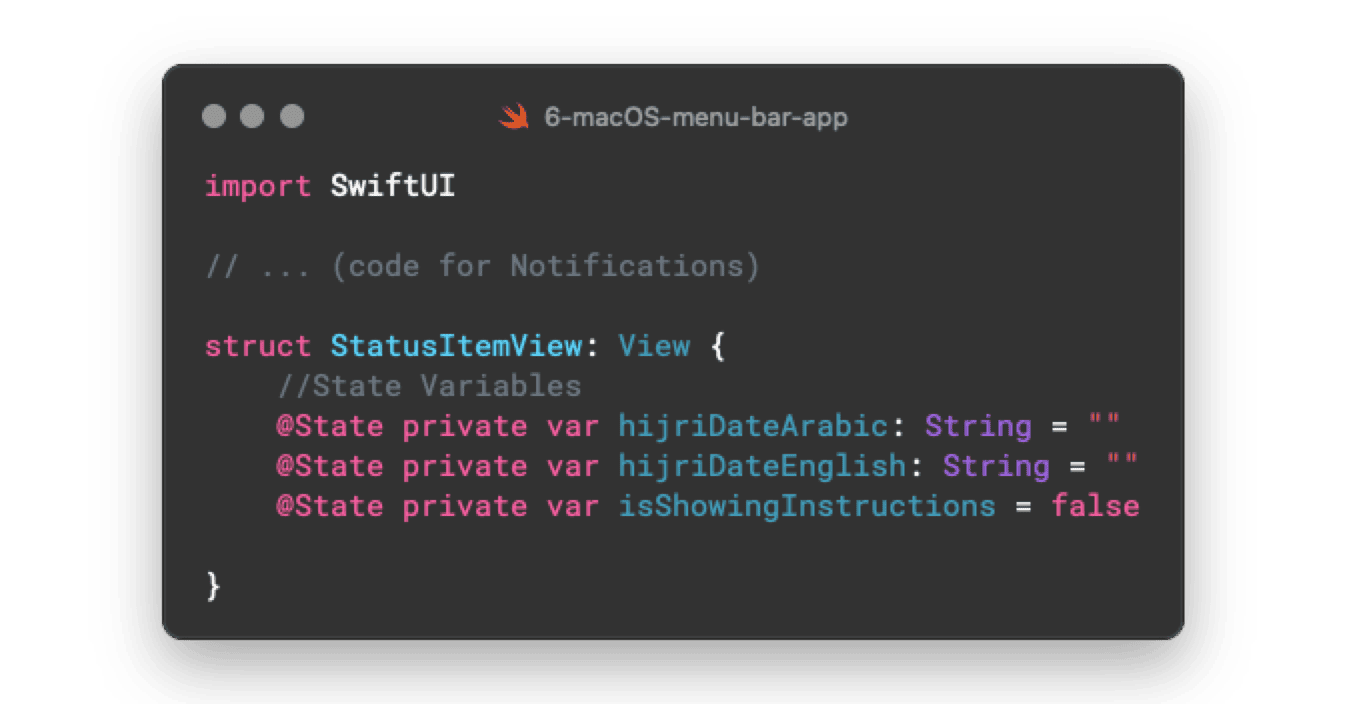
This view manages the date fetching and presenting that to the user. The app starts with state variables which will store the current Hijri dates in Arabic and English.
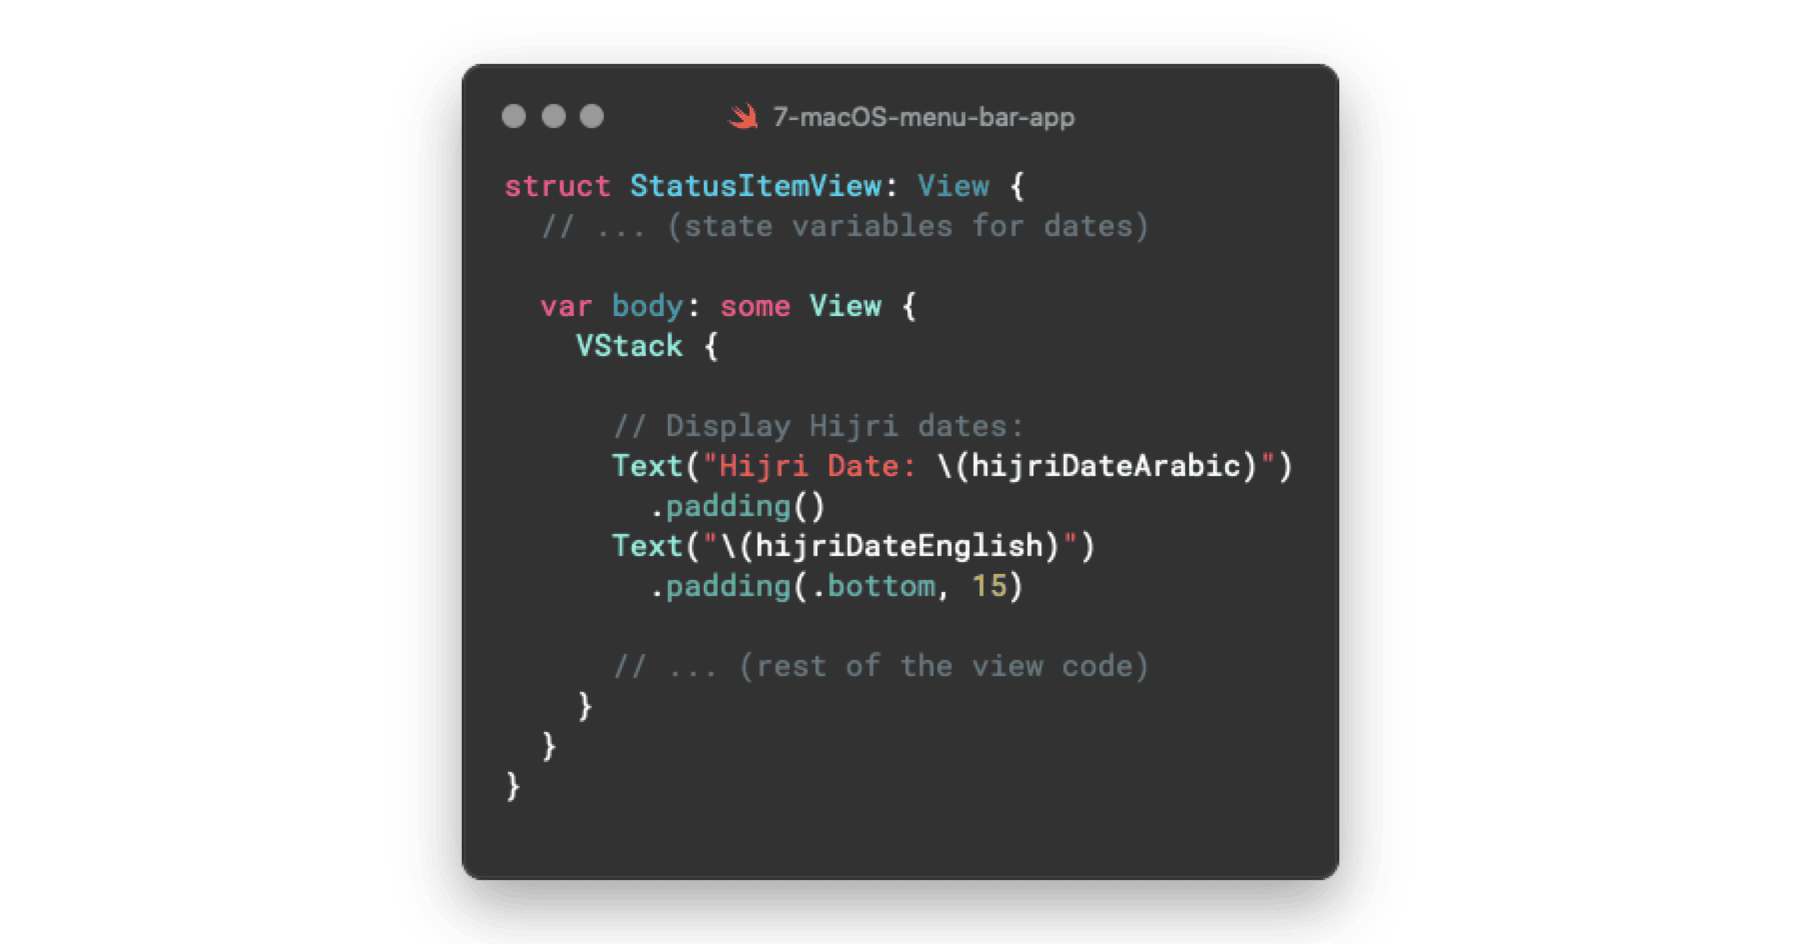
Next, we utilise Text views to display the information stored in the state variables (i.e. the current Hijri date in Arabic and English with appropriate formatting.)
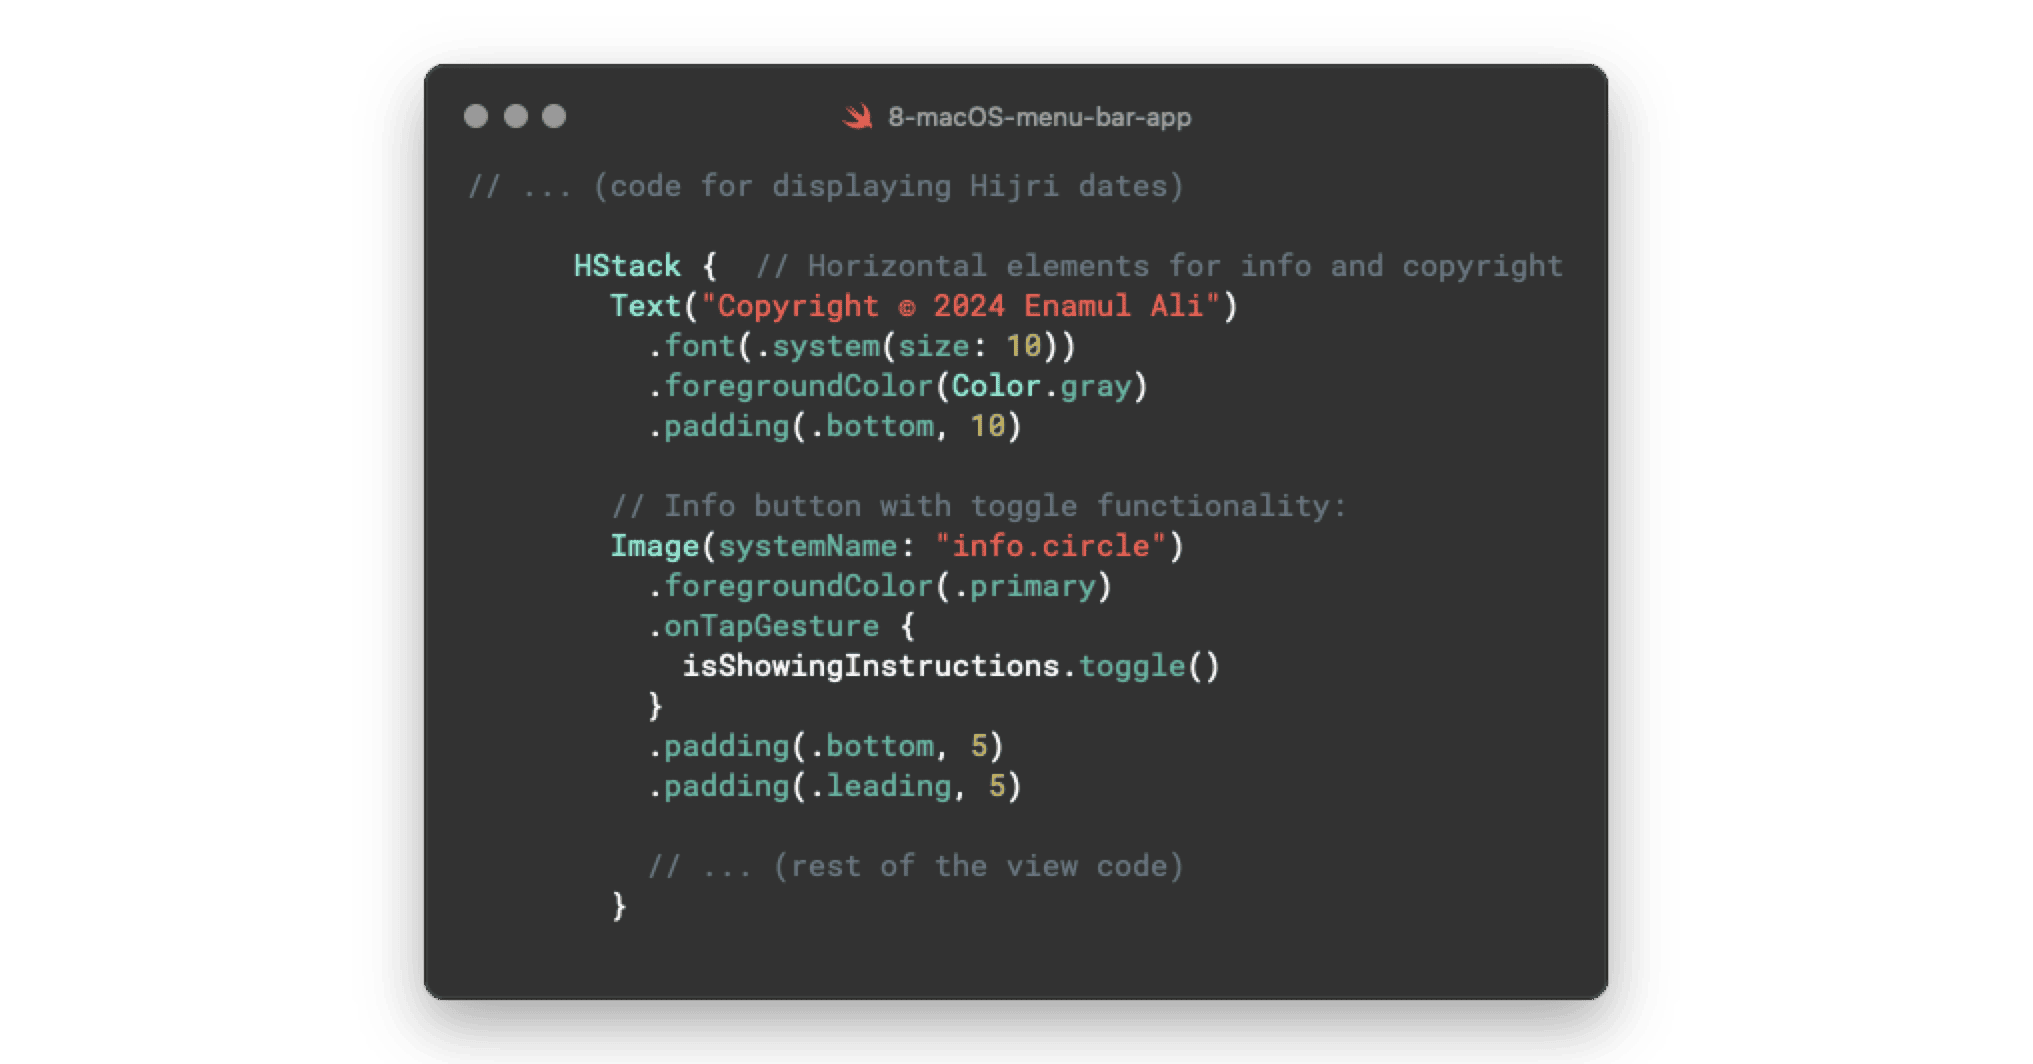
SwiftUI offers a horizontal stack HStack which is used here to display a copyright message and an information icon. Tapping the information icon toggles the visibility of an instructions menu (which is coded in a separate InstructionsView).
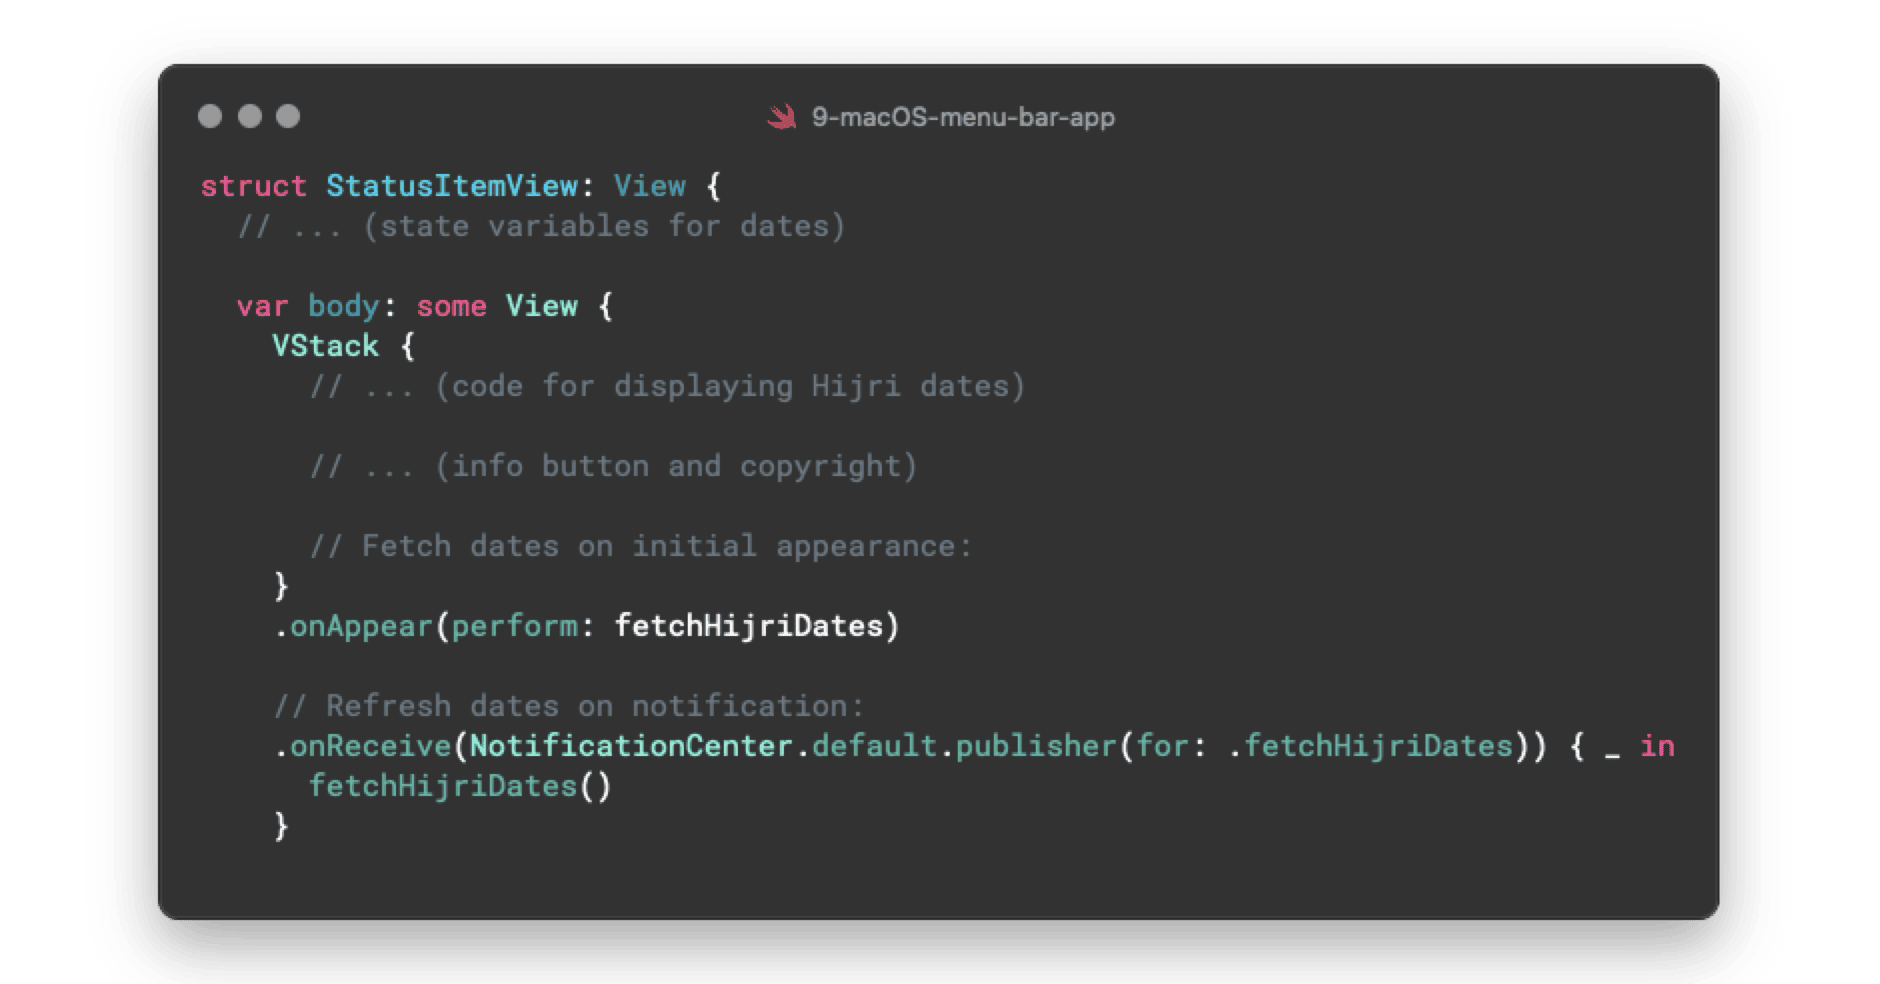
The app fetches the latest Hijri date in two ways: When the view first appears on the screen, it grabs the latest date for an accurate display. This is achieved using the onAppear method. However, this did not seem to refresh the dates subsequently, say every midnight, hindering the functionality of the app.
We can achieve this through utilising Swift’s NotificationCenter class. Here, a custom notification fetchHijriDates is triggered from the AppDelegate every time the popup is shown. The StatusItemView listens for this notification. When it is received, it fires the custom fetchHijriDates function (explained next) which will handle fetching the current date.
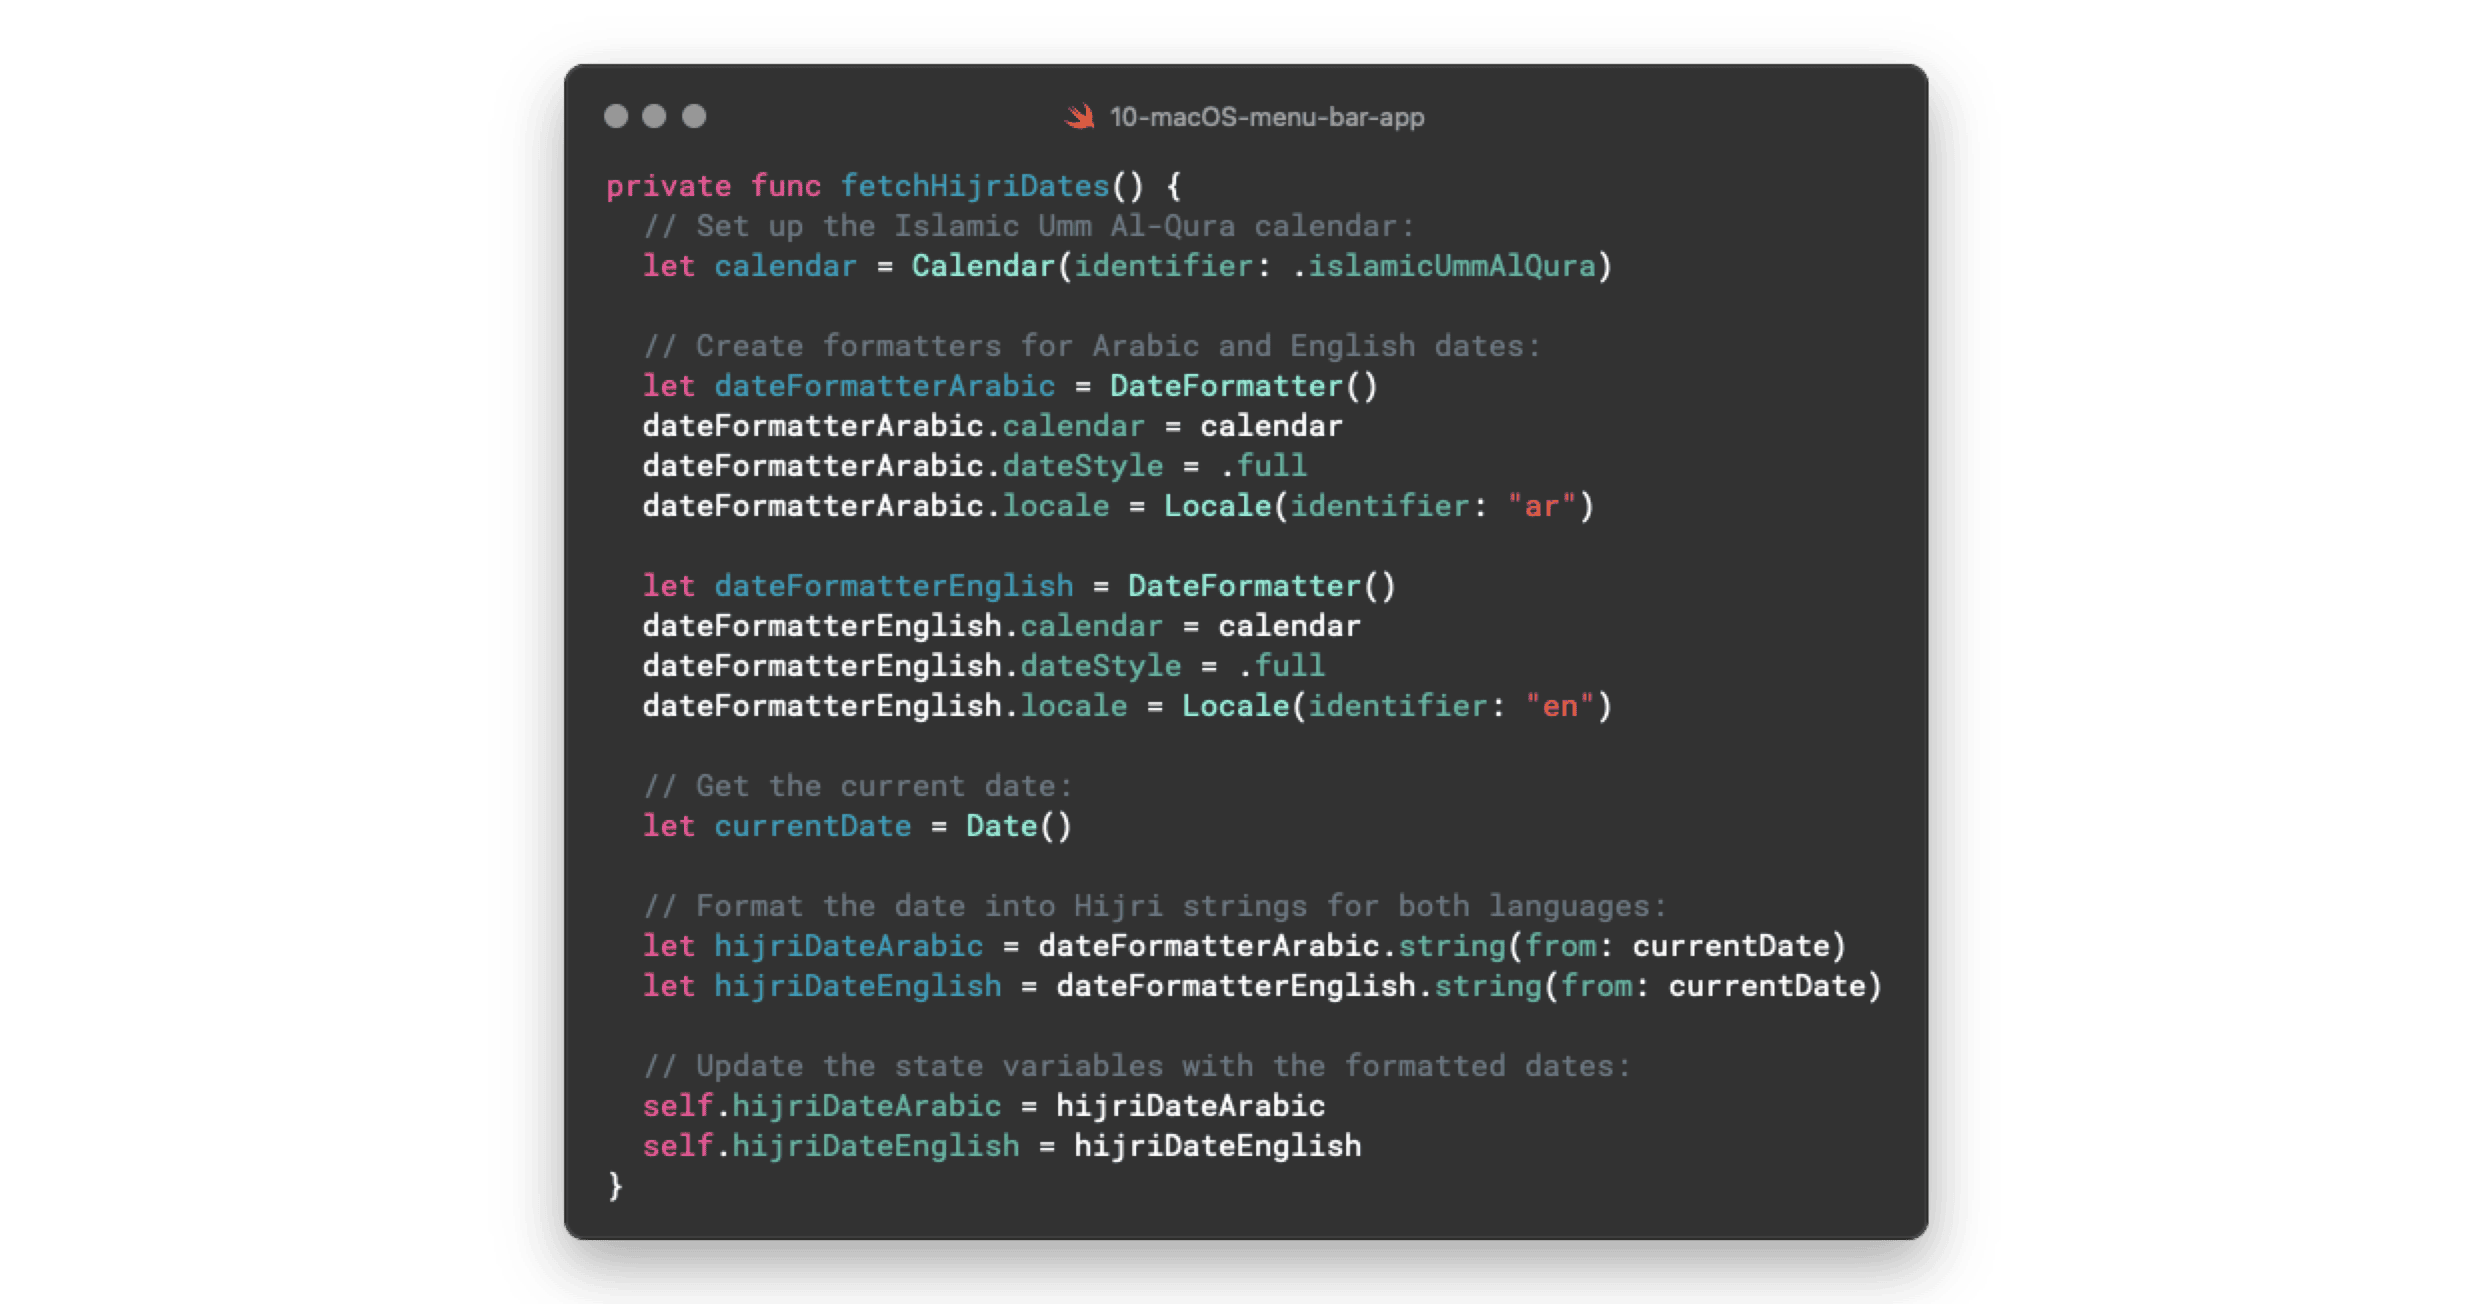
Behind the scenes, a custom fetchHijriDates function is responsible for fetching the current Hijri dates. It formats them according to Arabic and English locales and updates the state variables created earlier with those formatted dates. It is called both when the view appears and in response to the fetchHijriDates notification, discussed earlier.
Here we are able to leverage Apple’s built-in Date and Calendar functionality, using Calendar(identifier: .islamicUmmAlQura). This (satisfying) pre-built functionality saves us time and ensures accuracy and uniformity in our date handling.
This is the end of our discussion on the code. The full code can be found on the GitHub repo.
Below we will look at the rest of the development & build process.
Build Process & Challenges
Building the app in Xcode involved compiling the code, resolving errors and creating a distributable package. This process also involves setting the minimum macOS version, which is set to 12 for this app.
App Icon
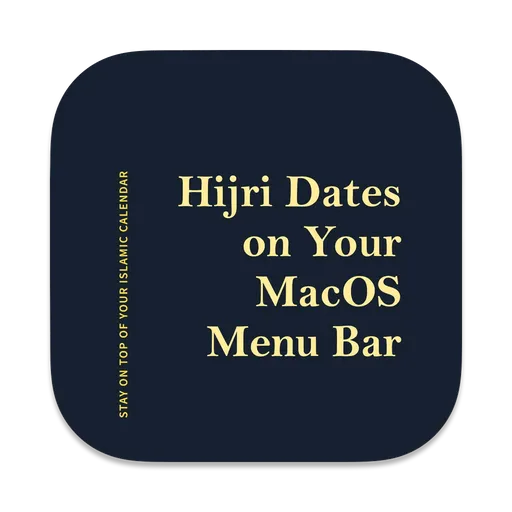
Creating a visually appealing icon was important. A custom icon was designed and added to Xcode in various sizes to ensure it adapts to different screen resolutions. I used this free online tool to achieve this.
Distribution
Distributing through the Mac App Store, requires a paid Apple Developer ID, so I chose to make it freely available on GitHub. Subsequent releases were uploaded via GitHub Releases.
Contemplating Further Features
Features like automatic launch at login were initially considered. Launch at login ensures the menu bar icon is always visible (i.e. that the app is started after the user logs in/restarts their machine). However the focus remained on core functionality and a simple user experience. Instructions are provided to users during installation to manually set launch at login.
Creating DMG File
To ensure smooth installation, I created a DMG file, using the create-dmg tool. Clear and concise instructions were included to guide users through the installation process. Using the downloaded DMG file, users can drag the app to their Applications folder, and launch it from there.
Conclusion
This journey, from concept to distribution, has been a valuable learning experience in macOS development. I hope to continuously improve the Hijri Menu Bar app and provide users with a seamless way to view Hijri dates on their Macs.
If you’re interested in trying out the app or contributing to its development, you can find it on GitHub.
